Showing posts with label Crafts. Show all posts

Tuesday, January 25, 2011

French Dress Paper Garland

Since I love to scrapbook, I have TONS of pretty scrapbook papers and embellishments.  However, I'm short on time and haven't been able to put together scrapbook pages lately.  Plus, I've done a lot of digital scrapping and really like it.  I'm kinda moving more in that direction.  But I can't let all those pretty papers go to waste, so I'm always looking for paper crafts to make with them.

I found one that I absolutely loved yesterday and just had to make it for Abby's room. 

A french dress paper garland!  Isn't it lovely and girly?  Abby really liked it.
(All pictures enlarge when clicked.)

Little Birdie Secrets originally came up with this precious idea and sketched it out, then Ashley at Cute As a Fox generously created a *free* printable template.  They used this garland for a baby shower and it just looked precious!

I just cut out the template, traced it onto my scrapbook papers, cut and embellished.  To make it into a garland, I punch holes in the arms and threaded a cute ribbon through.  Easy peasy!


I decided to hang it on Abby's vanity mirror over her dresser.  (Picture of me included for your viewing pleasure...NOT!!!)


Another view.  I need to do a post all about Abby's room someday because she has the cutest, most girly room!


Oh, and Superman showed up during all this crafty fun.  :)


Happy Tuesday!!

Monday, January 24, 2011

Valentine's Day Chair Backers

Are y'all already tired of me posting about Valentine's Day yet?  It's still a few weeks away, but I wanted to prepare ahead for it since I'm starting work (aka: student teaching) on Feb. 7.  I mentioned a while back how much I loved these chair backers from Pottery Barn Kids.


Aren't they precious?  I really wanted to order them but thought I could make them cheaper.  And then when I decided to just order them instead of spending the time to make them, they were sold out.  Story of my life!

Well, I did go ahead and make them.  Granted they aren't nearly as perfect as the PBK ones, but my kids love them all the same.  I found THIS wonderful tutorial that helped me achieve my goal. 


Here are the two I made for my kids.  They look wonky in this picture but actually look better in person.  I'm not a professional by any stretch of the imagination so there are definitely some imperfections!


This is the lining of Wyatt's bag.  I was originally going to use this one for Abby's but decided to go with something else.  I did the inset heart on the front in the same fabric.


Here is the lining of Abby's bag.  I knew I would regret using the soft minky fabric.  It's beautiful and soft but it is SO difficult to work with.  It is so slippery and I had the worst time trying to get the seams to stay lined up.  I just finished another project with it and had no idea what I was getting myself into!  If anyone has any tips for working with it, please let me know.


Instead of inseting the heart on Abby's bag, I appliqued it on and topstitched around it.  Then I used iron-on, flocked letters to personalize them.  Easy peasy!

I've already bought all the goodies to fill the bags with, so I can sit back and relax until Valentine's Day.  {Unless I come across something else that I just HAVE to make. ;) }


Linking up with:


Making

Keeping It Simple


Thursday, January 13, 2011

Valentine's Day Wreaths

I love decorating for holidays and Valentine's Day is no exception!  I have been finding some inspiration from some of my favorite craft blogs and decided to make a couple of wreaths.

The first wreath I made was adapted from an idea I saw here.  It was super simple to make, and I already had most of the supplies on hand.  I did buy some new scrapbook paper, but that was it so the cost was minimal.

 Here is the scrapbook paper I used.  Sorry, not the best lighting.


Here's a close-up of my favorite paper.  I just love the vintage, retro illustrations!


The finished product.  The main difference between the inspiration wreath and mine is that I used a floral wreath form and wrapped it in ribbon.  I also didn't cover the hearts with clear glass glitter, but it would look really cool if I did.  I still might!


Onto the second wreath.  This one is a rag wreath made entirely of fabrics I already had on hand.  And a wire hanger.  How easy is that?!  Here is the link for my inspiration wreath.


My finished wreath.  I really like this one!  It came together in less than an hour.  The most time consuming part is cutting and tying the fabric, but it was a good excuse to sit down and watch a favorite show!


How precious are these chairbackers from Pottery Barn Kids?  Love them.  I saw them a week or so ago on the website and thought I could probably make them for cheaper.  Then I decided that I didn't have time to make them and checked back on the website and they're sold out.  (Boo)  Anyway, I started searching around and found this awesome tutorial.  I went out and bought the materials and am almost finished with my first one, so I'll be sure and post when it's all done. 

Anyone else decorate for Valentine's Day or am I the only  lunatic that does one?

Wednesday, December 29, 2010

Show & Tell: Canvas Family Tree

I've been wanting a personalized canvas family tree for a while now, but they can get really expensive so I've been hesitant to have one made.  Being that I'm the crafty type, I thought I would try and make one myself.

I used these two as my inspiration:


This one is from Walmart.com.  I had no idea you could even get something like this from Walmart.  It is actually not very expensive, but I'm not totally sold on the overall appearance.  Anyway, I like the rustic hearts and stars.  The shape is very simple but cute.


I found a tutorial for this one HERE.  I really like the muted greens and blue contrasted with the dark tree trunk.  The family monogram in the center of the tree is great too.

So combining my favorite elements of  both canvases, this is my creation...


I went with a more simplistic design like the first picture, plus I used hearts and stars.  I incorporated the family monogram like the second picture and used the soft blue and green with a dark trunk.


I used a micron pen to write the name and year of birth of each family member on a leaf.  (This is just for our little family of 4)  I wrote our last name and the year our family was established in the center of the tree.


I jazzed it up with these 3d bird and butterfly stickers.  I had everything on hand except for these, so the cost was minimal.

I started by painting the canvas with blue and green acrylic paints.  I tried oil paints first, but they were going to take way too long to dry.  The acrylics dried super fast.

I cut out the hearts, stars, leaves, and tree trunk from textured card stock and then Mod Podged them on.  (Note: This craft would have been so much easier if I owned one of THESE.  I am definitely going to add this to my wish list!)

I'm thinking I might add some more leaves to make the tree a little fuller.  And I might have gotten a little carried away with the stickers.  What can I say, I love butterflies and birds.  :-)  What do you think?

It was super easy to do plus it is even more special since I made it myself.

Tuesday, December 14, 2010

Homemade Gifts & Goodies

I have been on a quest the past couple of weeks to find a great gift for Abby's teacher, Mrs. Kepley.  We adore Mrs. Kepley!  She is a sweet, hardworking lady, and I really wanted to put some thought into her gift.  When I couldn't find what I wanted, I decided to make her something.  (Warning: picture heavy post!)

Mrs. Kepley usually doesn't leave the school until after 6:00PM.  She stays late to prepare for the next day.  I decided to make her a basket full of meals in a jar to helpfully make dinnertime a little easier on her.


The basket full of jars.  I'm going to add a pretty bow and a tag to finish it off. 


Cookies for Santa mix found HERE.  These will be great for Mrs. Kepley and her husband to share!


Texas Two-Step Soup.  We are in Texas so I thought this would make a great dinner on a cold winter evening.  I bought THIS recipe book a few years ago at Country Clutter and it has all kinds of great recipes.


Another recipe found from the book listed above.  This one is for Goulash, one of my favorites!


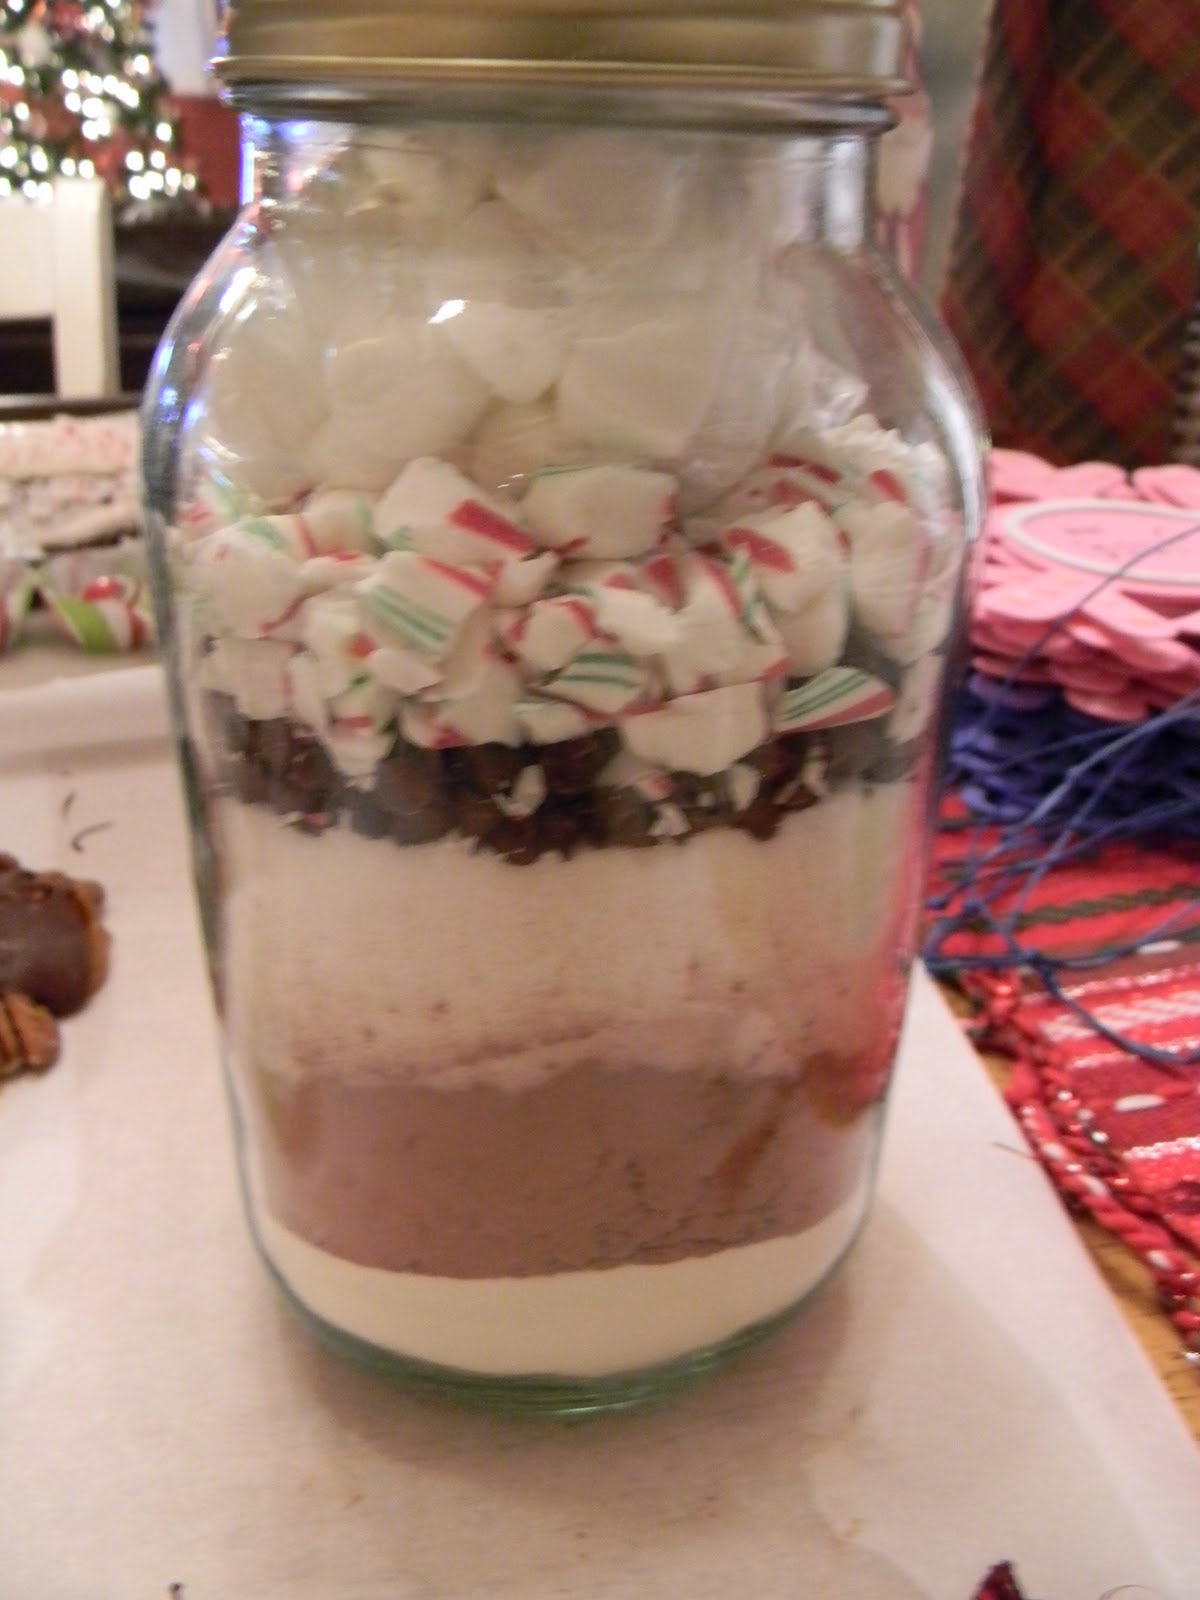
Peppermint Hot Cocoa mix.  I found the recipe HERE.  This picture was obviously taken before I embellished the jar and added a label.  This would be great to have with the cookies!


I also made Mrs. Kepley a little sign for her classroom.  She is a new teacher, so I don't think she has accumulated many handmade gifts yet.


I bought the unfinished chalkboard at Michael's and embellished it with ribbon and little wooden cutouts.  I used a paint pen to look like chalk.  I searched all over the place for a little tiny eraser and chalk to add to the bottom.  I thought I might find something made out of polymer clay or something similiar, but it was a no-go. 


Abby signed the back to make it extra special!

I also picked up a cute monogrammed ornament for her and might swing by the local teacher supply store to pick up a gift certificate.  Teachers spend so much money out of their own pockets for their classrooms.  (I have already begun stocking up on supplies, books, and other necessities so that I'll be a little ahead of the game when I have my own classroom!)

Abby's class Christmas party is coming up on Thursday, and I am in charge of bringing a "sweet snack".  I gone back and forth between decorated sugar cookies and cupcakes and have finally decided on the cupcakes.  I found some cute liners and picks.  I can't wait to make them tomorrow!

I wanted to make something special for her classmates so I decided on inexpensive snowflake ornaments. I found the kit at Hobby Lobby (50% off!) and finished them last night.  They are supposed to be picture frame ornaments, but I decided to just write each child's name and the year in the spot meant for a picture.


Pink for the girls...


and blue for the boys!

In addition to all this (I've been pretty busy!), I made my holiday treats today that I will be delivering to my neighbors and friends tomorrow.  Here's what I made...


Peppermint bark.  Sometimes I add the dark chocolate layer on bottom and sometimes I don't.  This year, I did!


Pretzel bites(?).  Not sure what these are called.  They are just square pretzels with a Hersey's Kiss or Hug (I made both)  melted on top with an M&M in the center.  Super easy and yummy!


Fudge.  Need I say more?


"Turtles".  These are my absolute favorite.  I had to package them up right away so I wouldn't eat them!

I'm still working on these next two items (I had to stop and blog!), so I haven't taken pictures yet. 


via 

Holiday Popcorn Balls.  I love popcorn balls, especially if they have M&Ms in them. :-)


My friend Bre made homemade marshmallows recently, and they were SO good!  I'm currently making peppermint marshmallows and am even going to dip some in chocolate.  Bliss!


One of the goodie baskets (less the popcorn balls and marshmallows).  I hope my sweet friends and neighbors enjoy them!

I'm completely worn out after today and still have to take my final for a graduate class I'm taking.  Ugh.  I might need to snack on some sweet treats to keep me going!

Thursday, December 9, 2010

Some Holiday Happenings...

Another random Christmas post.  Sorry, but I am in full Christmas mode right now!  Last night after church, we decided to take the kids to look at a few Christmas lights.  Now, we aren't doing our big light trip until Dec. 17, but we thought we would hit the area close to our house for a few minutes.

We have an anesthesiologist here in Amarillo who goes all out with Christmas lights.  (Think Clark Griswold x100!)  He has several Christmas songs set to coordinate with the lights!  He doesn't live very far from us, so we thought we would swing by so the kids could see the display. You can read about his light show here and here.

Here is a youtube video of his show.  This one is a few years old, so I can attest to the fact that his display is even more magnificient now and especially in person! 


I also wanted to share a recipe for a simmering Christmas potpourri my sweet mama used to make when I was growing up.  It smells so wonderful- I make sure have a pot simmering on the stove throughout the season, but especially on Christmas day.  It brings back such good memories!  I'm including a link for a recipe with actual measurements since I never measure but rather just eyeball and throw things in until I like it!  Recipe link


Christmas Simmering Potpourri
1 orange, sliced
1 lemon, sliced
Cinnamon sticks, 3 or 4
Whole cloves (I use a handful because I love the smell of cloves!)
Bay leaves, 3 or 4
Ground cloves, a tsp or so

Combine all the above ingredients in a medium saucepan and fill with water.  Simmer on low heat, and add more water as needed.  Enjoy the wonderful aroma of Christmas!


Another easy Christmas craft that looks festive and smells wonderful are pomander balls.  I made these as a little girl and now make them with my little girl.  Stock up on whole cloves and oranges!  There isn't much to it...just stick the cloves in the oranges, but you can click on the link above for adding ribbons and other variations.

Don't hesitate to try these today!

Monday, November 29, 2010

Blog Challenge Day 7


Today's Topic: Holiday DYI Crafts.  I've been looking forward to this one because I'm pretty handy with my sewing machine and trusty hot glue gun! ;-)

I've seen the deco mesh wreaths everywhere recently: blogs, craft shows, boutiques....  They are lovely, but I'm just not willing to pay $100+ for a wreath.  So, I decided to try and make them myself. 


This is one that I made for my mom.  I used an articifical pine wreath as the base and attached my mesh and other embellishments to it.  Easy peasy!


This is the one I made for myself.  I used a wired wreath form for this one.  I think I should have used more mesh or wrapped the wreath form in ribbon because it shows through a little. 


A close-up of the cute sign I found at Michael's.  It was meant to go on a banner,  but I thought it would look perfect on my wreath.


Another craft I've made recently is a glittered styrofoam ball tree topper.  I saw this idea from a Martha Stewart show.  Here's the LINK with step-by-step instructions.


I had trouble getting a clear picture of this one.  I added a few more things so it looks better in real life.  I did mine a little differently than the Martha Stewart version.  I put my balls and ornaments on bamboo skewers and wired them together. 

One more!  This isn't really a craft, it's clothing.  But I made it myself and it's Christmas themed, so I thought I would include it.


Applique Shirt and Double Ruffle Jeans (modeled by my sweet Abby).


I made my own applique by tracing & cutting out a tree shape on different fabrics and adhering them to a paper-backed fusible web.  Then I ironed it onto the shirt, stitched around with a think zigzag stitch, and embellished with fabric covered buttons and a bow. 


The ruffle jeans are simple to do.  I just made my ruffles out of fabric and sewed them on.  I topstitched around each ruffle to make sure that they laid right. 

These are a few crafts I've done recently.  I can't wait to see what everyone else is making!